Materials,
Techniques and Processes Analysis sheet
Material/Technique/ Process Name: Pencil
Variations or types i.e. 2B 2H pencil or shape/motion
tweening: HB Pencil

Hold the pencil firmly in your index, middle and thumb. Press down on the led side of the pencil to create a line and begin drawing.
Relevant dimensions or constraints
Hexagonal Prism joined to a Hexagonal cone
I cannot move on its own, it needs someone to use it to create it.
It is around 15cm, depending if being sharpened shorter. It can be spherical, Hexigon shaped etc.
Health and Safety issues related to Material, Technique or
Process: Do not throw across the room or at anyone, if it hits them with a pointy end it can hurt them.
Evaluation (How you found exploring each Material, Technique
or process): I found using this material very useful to create images that are able to be rubbed out using an eraser and to start again. Its gives me a unlimited chances to get things the way I want.
Using this pencil techniques I am able to create so much future development with them, able to use different designed pencils that deepen and lighten in darkness and lightness. Being able to do such a thing I am able to create effective realistic work with pencil techniques.
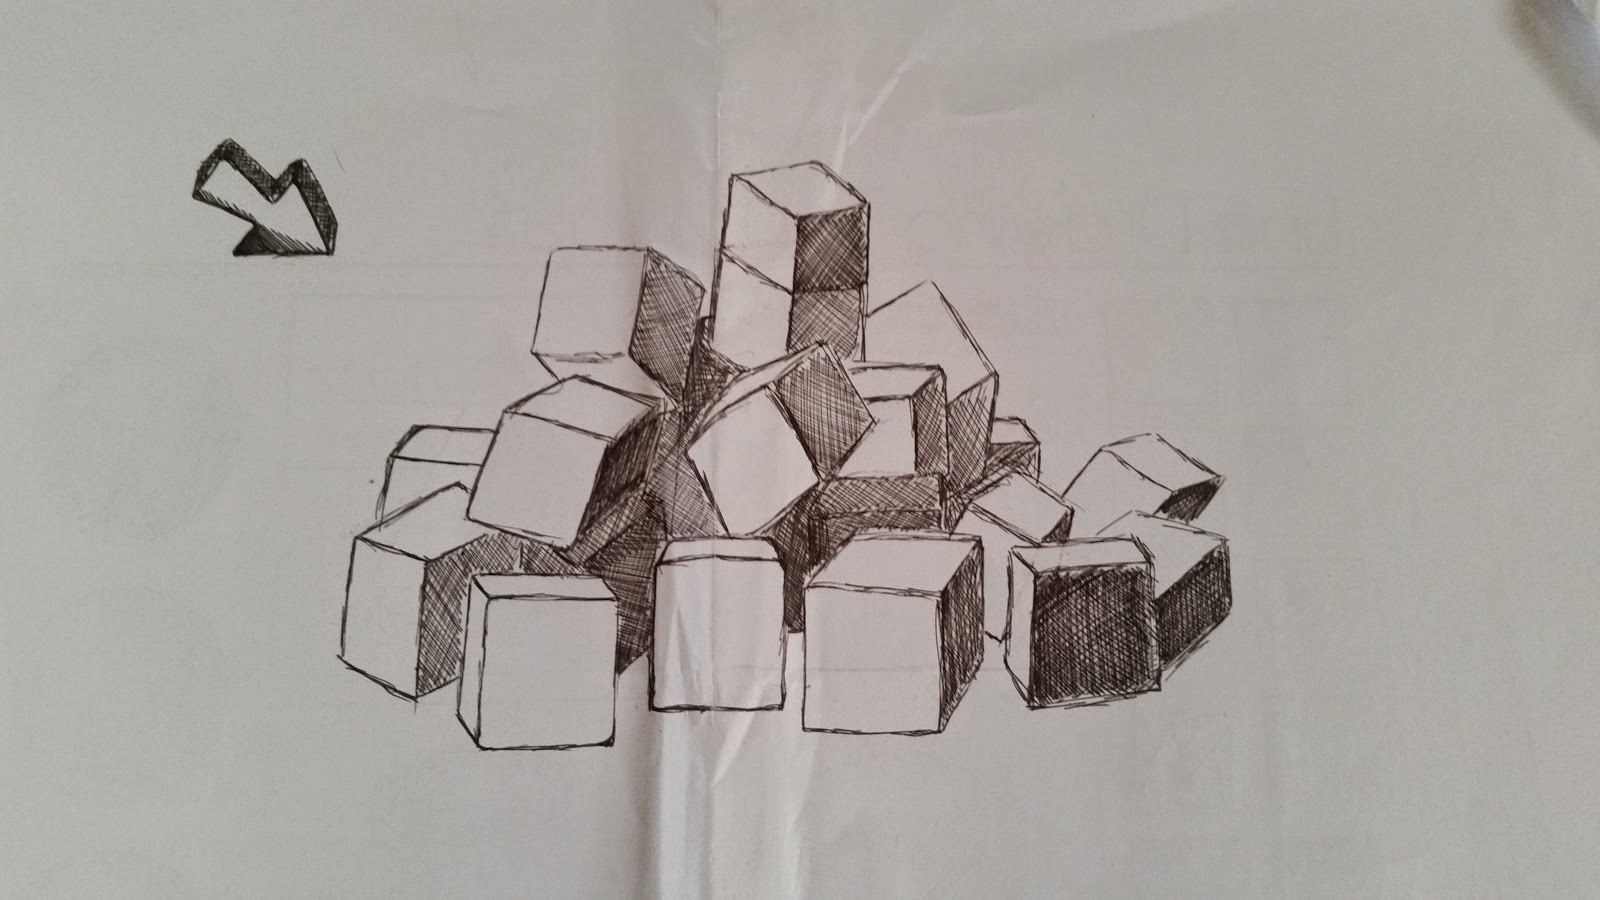
Using different techniques like cross hatch or line drawing I am able to use it in my work and able to explain what it is and how it creates a great effect with my work.
Using this pencil techniques I am able to create so much future development with them, able to use different designed pencils that deepen and lighten in darkness and lightness. Being able to do such a thing I am able to create effective realistic work with pencil techniques.
Using different techniques like cross hatch or line drawing I am able to use it in my work and able to explain what it is and how it creates a great effect with my work.
Materials, Techniques and Processes Analysis sheet
Material/Technique/ Process Name: Pen
Variations or types i.e. 2B 2H pencil or shape/motion
tweening: Fine Line, Marker, Ball point
 How do you use the material/ Step by step instructions for
technique or process? Like the pencil you hold it with your index and middle finger as well as your thumb. If the pen has a lid, obviously you must take it off. If its a click pen, click the end for the ball point to pop out.
How do you use the material/ Step by step instructions for
technique or process? Like the pencil you hold it with your index and middle finger as well as your thumb. If the pen has a lid, obviously you must take it off. If its a click pen, click the end for the ball point to pop out. Relevant dimensions or constraints
Hexagonal Prism joined to a Hexagonal cone: You are unable to erase a mistake.
Linked techniques: Cross Hatching, Line drawing etc.
Health and Safety issues related to Material, Technique or
Process: Do not eat/drink the ink and pen due to ink poisoning.
Evaluation (How you found exploring each Material, Technique
or process): The pen is a great material to use for bold, obvious lines in work. The problem with using a pen is that if a mistake is done it can either be a happy mistake or a bad one but you can't erase it out. Well actually depends I have a pen that does.
Being able to use pen I am able to keep certain
Being able to use pen I am able to keep certain
Materials,
Techniques and Processes Analysis sheet
 Material/Technique/ Process Name: Paper Prototyping
Variations or types i.e. 2B 2H pencil or shape/motion
tweening: Different coloured paper to indicate different things (In a webpage) Blue could mean a link, as red opens a picture.
 How do you use the material/ Step by step instructions for
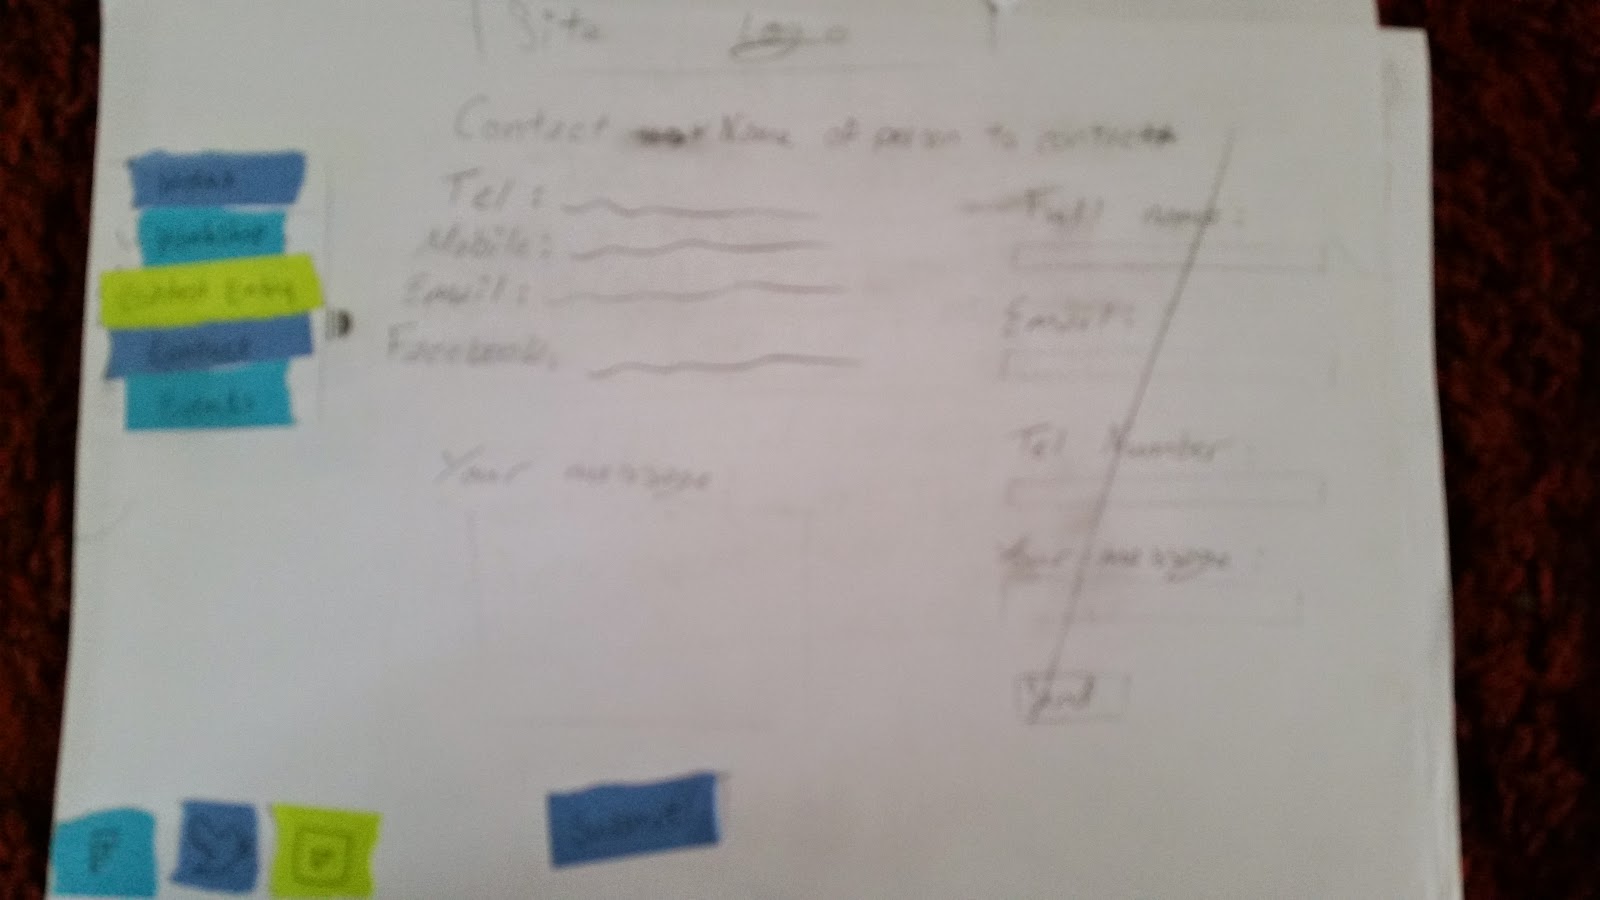
technique or process?: Use the paper to create a small basic prototype to be developed into a proper webpage. It gives a good design idea to plan out.
How do you use the material/ Step by step instructions for
technique or process?: Use the paper to create a small basic prototype to be developed into a proper webpage. It gives a good design idea to plan out.
Relevant dimensions or constraints: Depending on your paper size, you are limited to that.
Linked techniques: Rip and tear paper into smaller pieces.

Health and Safety issues related to Material, Technique or
Process: People can think its funny to make paper airplanes and throw them which could catch you in the eye. Luckily I have glasses.
Also paper cuts can cause some severe stinging.
 Evaluation (How you found exploring each Material, Technique
or process): I found using this technique very useful, because it basically creates a site that is interactive and you can produce the main webpage much more fluently with knowing where and what goes to which places. One problem is that you can be limited to one size of paper if you have such sizes.
Evaluation (How you found exploring each Material, Technique
or process): I found using this technique very useful, because it basically creates a site that is interactive and you can produce the main webpage much more fluently with knowing where and what goes to which places. One problem is that you can be limited to one size of paper if you have such sizes.
Materials,
Techniques and Processes Analysis sheet
Material/Technique/ Process Name: Thumbnail Sketches
 Variations or types i.e. 2B 2H pencil or shape/motion
tweening: Different sizes of thumbnails, there is no scale actually needed
Variations or types i.e. 2B 2H pencil or shape/motion
tweening: Different sizes of thumbnails, there is no scale actually needed
How do you use the material/ Step by step instructions for
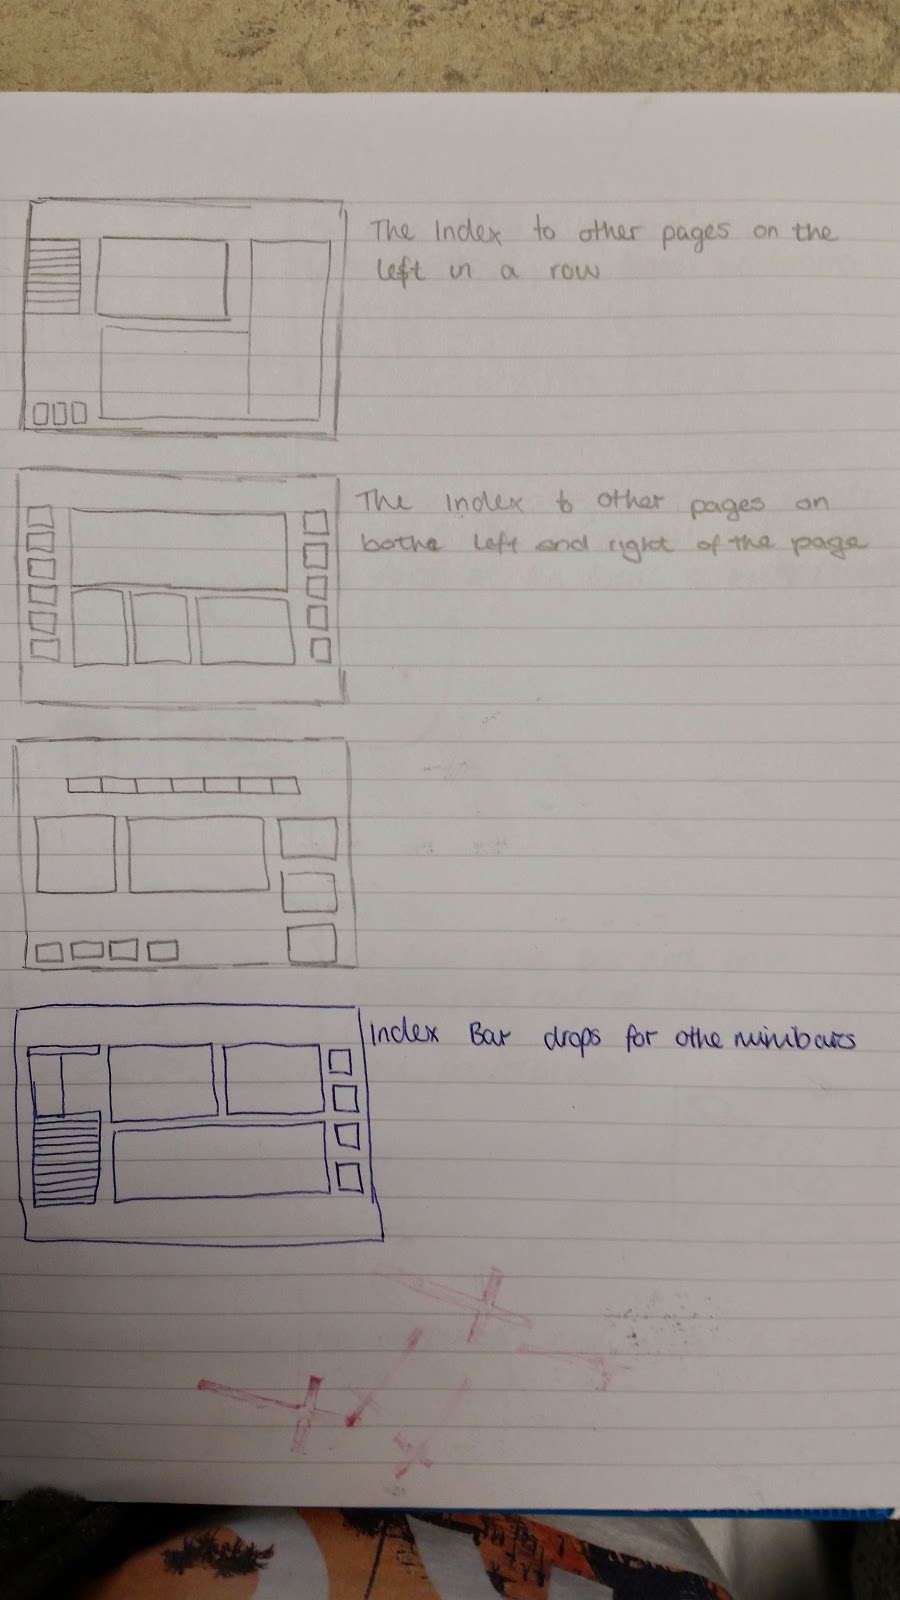
technique or process? Create a small/medium sized boxed of a quick sketch using your pencil skills from the first ever Learning Process we done and begin creating small ideas.
Relevant dimensions or constraints: Too much detail means less development and developing is a key thing in creating a project.
Linked techniques: Pencil, Pen, paper.
Health and Safety issues related to Material, Technique or
Process: Paper cuts can be caused if not moving with care around people and just waving it, just slicing your skin.
Evaluation (How you found exploring each Material, Technique
or process)
Thumbnail sketches in my eyes are very effective in wanting to work your way up to a final piece. Without having to go into any detail for the moment, its a quick and easy way to plan your work. I like to use thumbnail sketching in my work because I am able to quickly make up a few ideas eventually able to create a final piece.
Materials, Techniques and Processes Analysis sheet
Material/Technique/ Process Name: Thumbnail Sketch Development
 Variations or types i.e. 2B 2H pencil or shape/motion tweening: Bigger pieces from your smaller thumbnails
How do you use the material/ Step by step instructions for technique or process?
Have the thumbnail sketches from before and begin going into detail on them and possibly make them bigger so you are able to add as much detail as you can.
 Relevant dimensions or constraints: You are limited to your thumbnails, without preparation you are unable to develop on more ideas.
Linked techniques: Pencil and Pens
Health and Safety issues related to Material, Technique or Process:
Paper can cause paper cuts.
Evaluation (How you found exploring each Material, Technique or process)
Being able to develop my work into much more detail, I am able to get a step closer to my actual webpage design. Now that I have created more detailed work I am able to annotate much better, easy to point out where things go and where things shouldn't go. I am also able to change a few pages rather than sticking to just my thumbnails hence it being development.
Materials, Techniques and Processes Analysis sheet
 Material/Technique/ Process Name: Seamless Textures
Variations or types i.e. 2B 2H pencil or shape/motion tweening: Different Textures.
How do you use the material/ Step by step instructions for technique or process?
- Collect an image of any texture possible
- Cut out part of the image that has too much shading using the crop tool
- Filter > Other > Offset
- Use the clone stamp tool, with the correct brush.

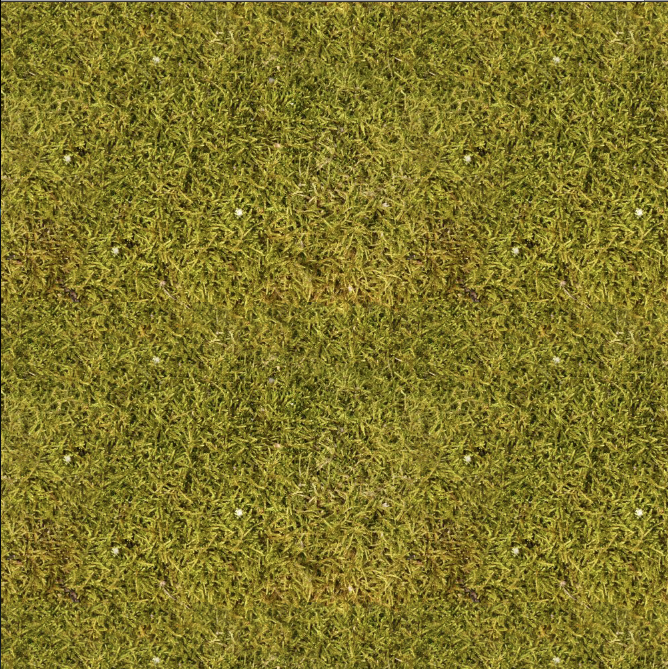 - Hold alt and click a part of the image and cover the lines.
- Edit > Define Pattern
- Get a new page, add a new layer, click the Fx symbol, Pattern Overlay and click the fill tool
- Finally click the page
- Collect an image of any texture possible
- Cut out part of the image that has too much shading using the crop tool
- Filter > Other > Offset
- Use the clone stamp tool, with the correct brush.
- Hold alt and click a part of the image and cover the lines.- Edit > Define Pattern
- Get a new page, add a new layer, click the Fx symbol, Pattern Overlay and click the fill tool
- Finally click the page
Relevant dimensions or constraints: Its difficult to get it to look right.
Linked techniques:
Health and Safety issues related to Material, Technique or Process: When collecting images, be careful of your environment.
Materials, Techniques and Processes Analysis sheet
Material/Technique/ Process Name: Wireless Frames
Variations or types i.e. 2B 2H pencil or shape/motion tweening: Different Column sizes, webpage width must be 960 Pixels as for the height it can be anything.
How do you use the material/ Step by step instructions for technique or process?
Download the 960.gs template and open it up in Photoshop and begin placing shapes of different forms to place where the buttons and placement of the website page.
Relevant dimensions or constraints: Difficult to create weird and crazy shapes.
Linked techniques:
Health and Safety issues related to Material, Technique or Process: Don't get the system wet or any electronics.
Evaluation (How you found exploring each Material, Technique or process) I found this process fairly easy as it is basically only basic shapes and it has no detail what so ever. I also found it very helpful on placements for my webpage in the future, it is easy to work from and gives me an insight on how it could possibly look on the actual website.

After using the C.R.A.P preference, I was able to use the colours very well as black, white and this shade of bluey/Green. I think they work well together because the logo I had found of the Poetry Slam is a shade of blue so I hope to match it up with that.

For next time I want to try and match the colour of the blue to the Logo of the actual website, If I do that I keep with the P of C.R.A.P meaning repetition, and it'll be easy to see because the black and white will split them up to be able to see such parts.
After creating a wireless frame I moved on to creating my final design of the webpage for poetry slam. I had followed the guide lines I had placed myself fairly well as everything is placed to where it is needed.

Here is my final webpage design.

Show Case
After creating a wireless frame I moved on to creating my final design of the webpage for poetry slam. I had followed the guide lines I had placed myself fairly well as everything is placed to where it is needed.
Here is my final webpage design.
Show Case
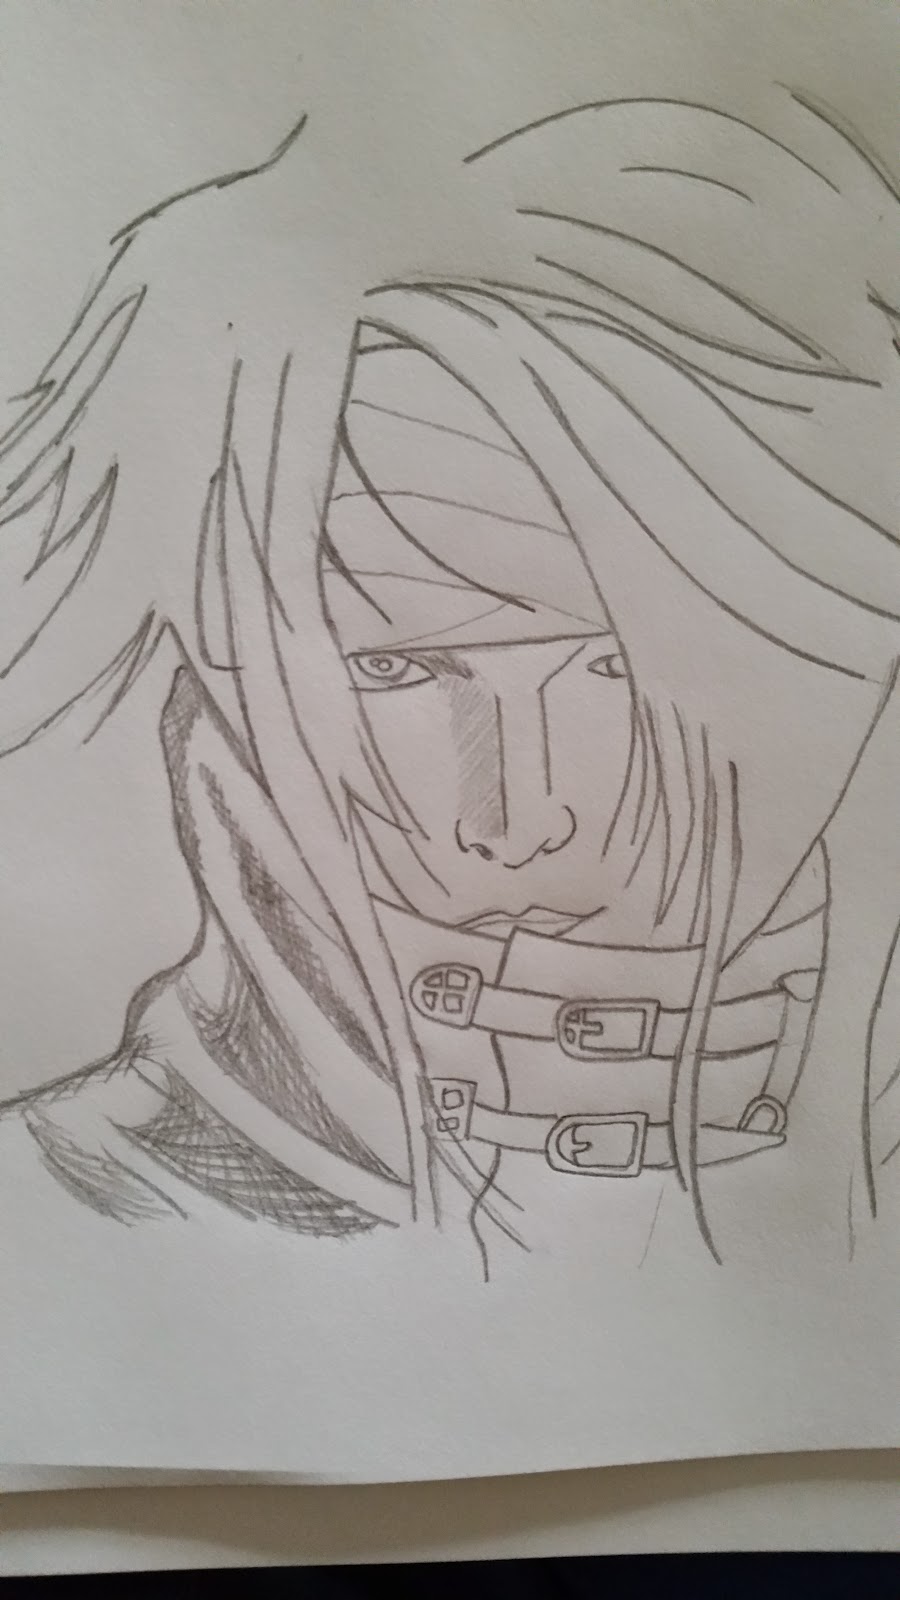
Creating a character in a concept style and photoshopping it
I started by drawing the frame of the head and basic lines to show where the eyes, mouth and nose will be. Doing this would be able to guide you through the entire drawing process and worked out well in creating the end of my project.

I added more detail to the areas that was needed such as the eyes, mouth and nose. I added the outside of the hair on the right and left to know where I will start on the hair. I rubbed out the guide lines of the eyes, nose and mouth as they are done. Adding the clothing at the bottom because that is what I wanted to include, part of it covers his face so I also partially had to rub his chin out. Above his eyes will be a bandanna I used the guide line that is used for his eyes to use for the bandanna.

After doing the basic outlines of the some parts of the character I began starting to add more outlines and details. The hair was more included and his clothes had more creases to indicate that it is clothes. Part of his hair covers his eye, I left his eye there to show you where his eye is and where it is covered. Extending on the no lines and adding the iris of the eye so I know where the pupil should be and where the colour of his eye should be.

In this part I added more of the details within the eyes and clothing. As you can see on his buckle the details have been added.The hair contains more strands to make it look more or less like hair. All of his clothing including the bandanna has been altered to adding detail.

Almost being finished with the drawing process using a wide range of line techniques the hair and the other buckle on his coat were needing completion, the hair needed more stands instead of being blank like before and was in need of some detail. As you can see it makes a big change making it look a lot like hair.

Drawing Process is now complete. Time to add shading and colour.
Shading and Colouring Process
I started concentrating on the bottom left of the character (His Coat). I used more line techniques combined with the drawn line techniques. The technique I had used mainly was crosshatch. By using crosshatch I was able to follow the way the jacket creases go. Making it look at if it does bend in at that point.

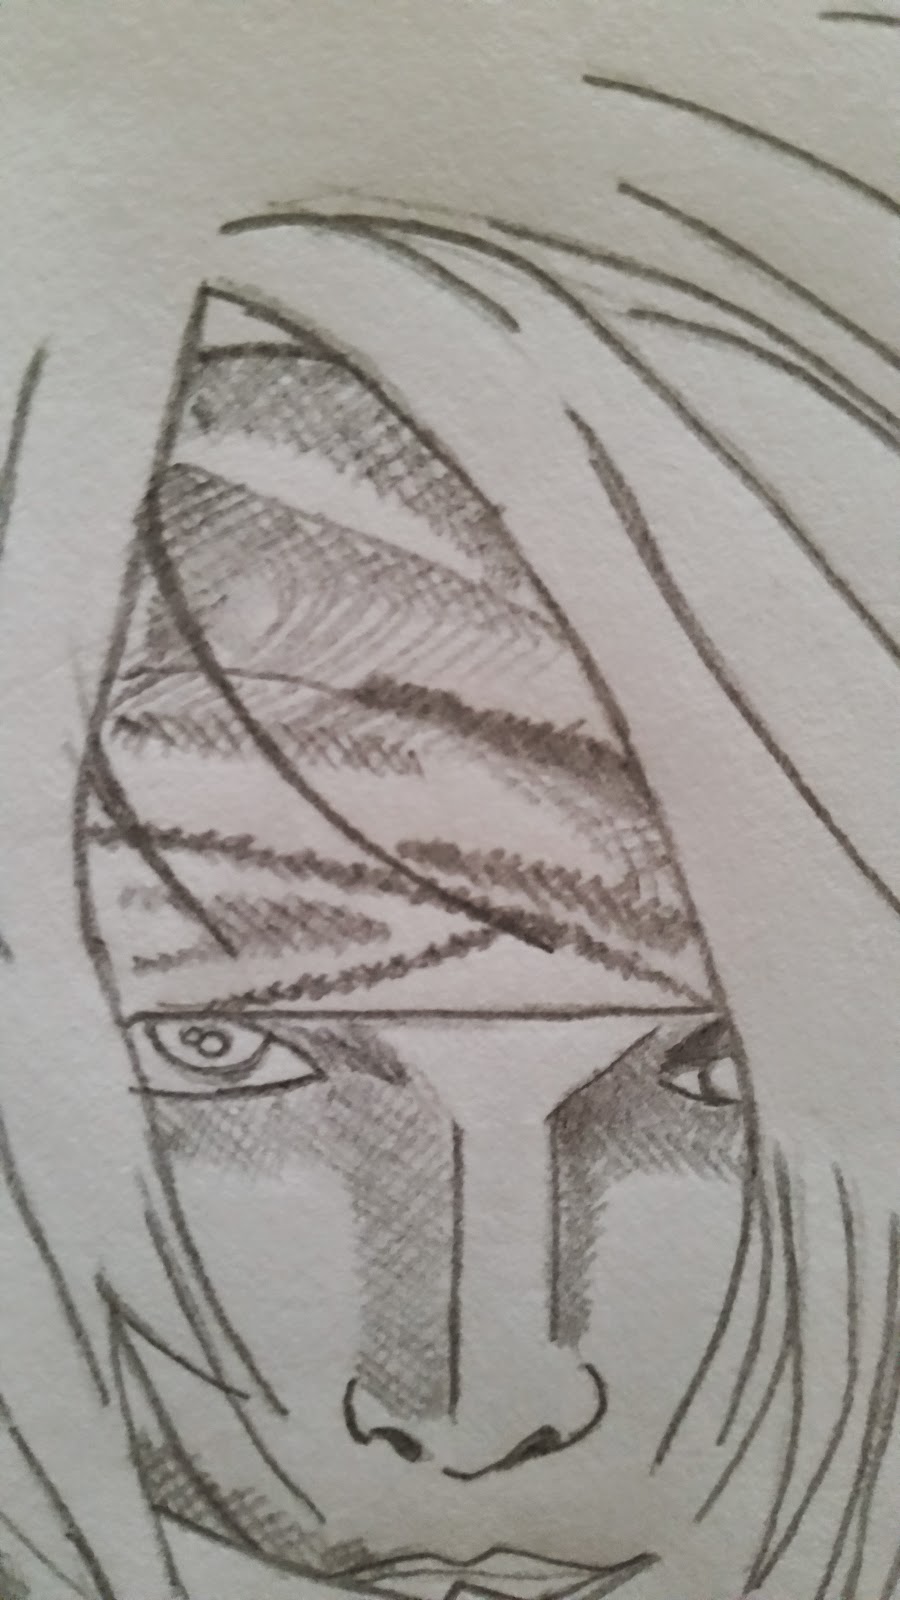
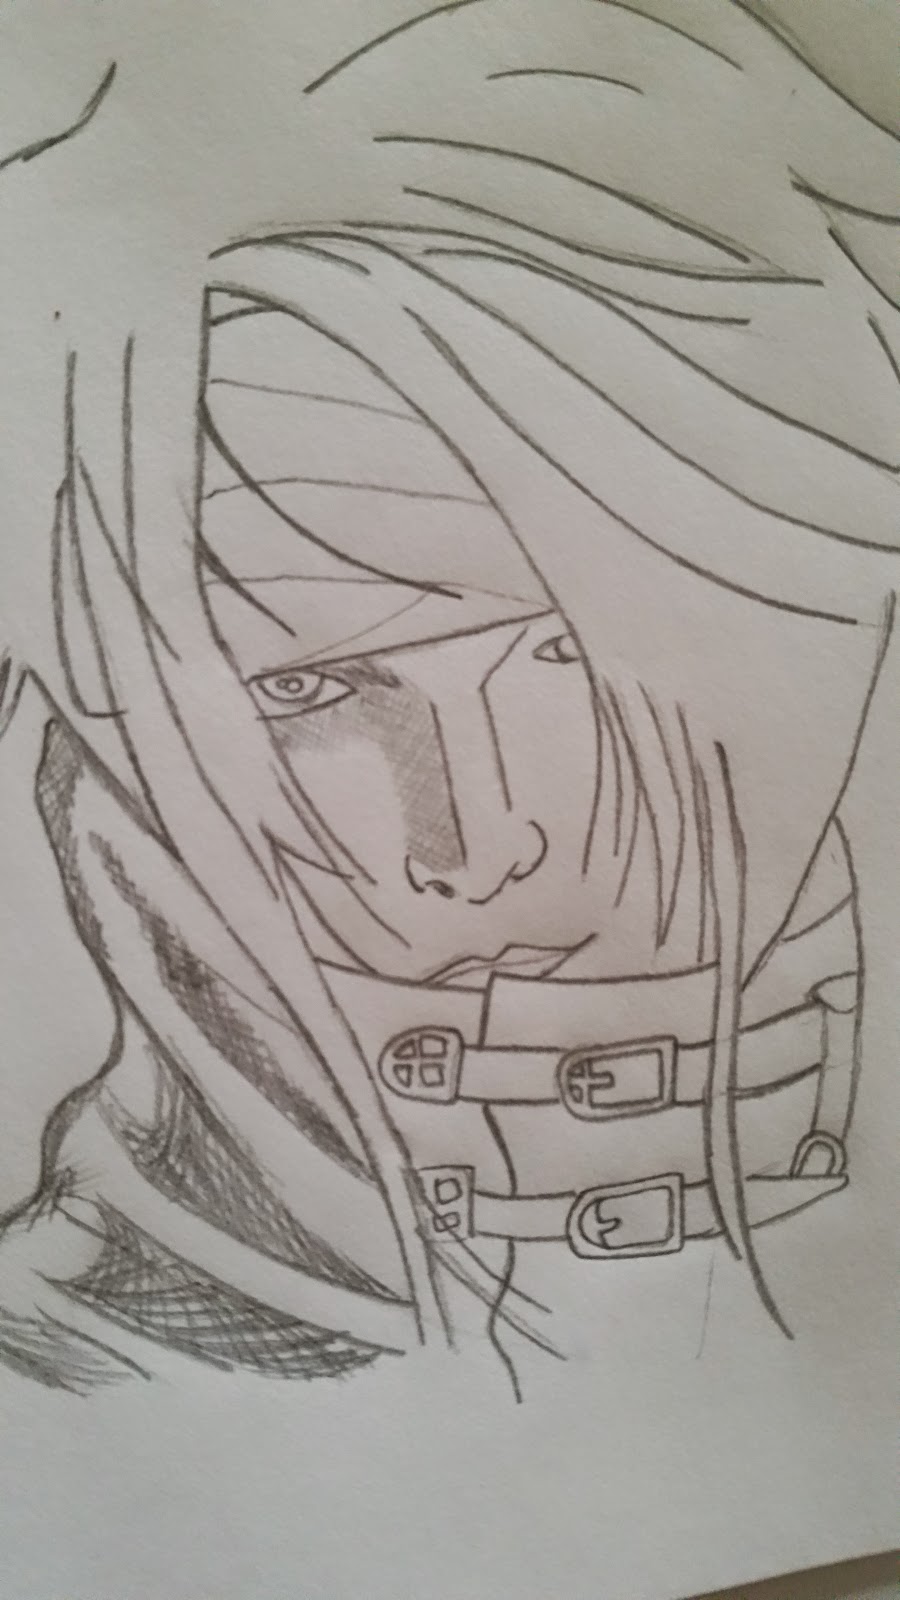 I then started around his facial area, his nose was in need of some shade and tone, using more of the technique Crosshatching and a lighter pencil I was able to add more of a lighter shade to his nose. I followed this technique until I was finished with the left side of his face, as you can see in the right page the shading is slighter darker and trails around his eye.
As I moved on further into the face I had used the same technique for the right eye, but making it darker following the light. His Bandanna was a part of him and was also in need to some shade and tone. During the shading and toning I stuck with the same techniques throughout.


Finishing the character of its techniques shading & Toning and cross hatching/line drawing.
After all that with the pencil only, colouring it would be a great material to mix with the techniques I have used in the creation of this character.
As the main colour of this character is red I also stuck with red, I used generally the same techniques as I did with the pencil but because the areas that needed darkening were already darkened by the pencil before it created a much better darkening tone and worked out well.

Due to some areas not being dark enough, I used a black pencil within his hair and some areas of his coat. It makes it look very effective.

Blue highlights were added to his hair, I wanted to keep his face the and the hair the like the paper because I thought it looked very effective and the colours show up more.

Recorded ShowCase of Photoshopping this drawn Character
During the process of this video I had experimented with many techniques Photoshop has to hold. During the experiments I found out what techniques and processes did not work to create the finished piece.
This video shows you how to create the character I have drawn to add colour and shade to it.
Techniques used
Quick Mask Tool: I used this technique within the video but I wasn't 100% Satisfied with the outcome, it didn't turn out the way I wanted but I was able to test this out and show myself why it wouldn't work (Around 1:00-2:00 of the video is shown where I used the technique)
Opacity Tool: The opacity tool was a very useful aspect within my development of the character. Using it a lot in the video it proved to be very useful for the outcome.
Paint Tool: This is the only tool that remained the same throughout the video, it is great and at points needed resizing and also having to change colours of darkness and lightness to be able to create shade and tone.
Cross Hatch: These techniques were used within the drawing process on paper and were proven to be very useful and effective with the drawn section of this show case.
Line drawing: This technique was used for both the drawing process and the shading and technique process, it is useful because of what the outcome it can be maximized to become.
Materials used
Paper and Pencil: Paper and pencil were an obvious material that was used during this project, it had created what I wanted to show by using my force.
Photoshop: First time using the Material Photoshop and for a first time it turned out effective with a few Youtube clips I had watched before doing my project.
Processes used
Pencil: The process used was moving the pencil but also putting more or less pressure on the paper to create shade and tone.
Moving the mouse: Moving the mouse and clicking to where I want to add colour onto my Photoshop design is the process I had used.
